


Background
I have an E5 subscription and was originally using a solution involving running the driveone/onedrive:edge Docker container to achieve synchronization. However, this solution had drawbacks: firstly, it lacked a GUI/WebUI, and secondly, each sync operation would consume 25%-50% of CPU resources. Considering that TrueNAS's built-in sync solution can sync to WebDAV, I thought of using Alist to mount OneDrive and convert it into WebDAV for TrueNAS to mount.
Process
Installing Alist
Create a persistent storage folder for Alist and write a Docker Compose file according to the official Alist documentation:
services:
  alist:
    environment:
      - PUID=3000
      - PGID=950
      - UMASK=022
    image: xhofe/alist:latest
    ports:
      - '8088:5244'
    restart: always
    volumes:
      - /mnt/systemdata/DockerData/alist/etc:/opt/alist/data
      - /mnt/data/Storage:/mnt/data
Here, I exposed the Alist port on 8088. Mapping /mnt/data/Storage allows Alist to manage local storage; mapping /mnt/systemdata/DockerData/alist/etc serves as the folder for storing Alist data.
Configuring OneDrive on Alist is not discussed in this article; please refer to the official Alist documentation. Here, I mounted my OneDrive at /OneDrive.
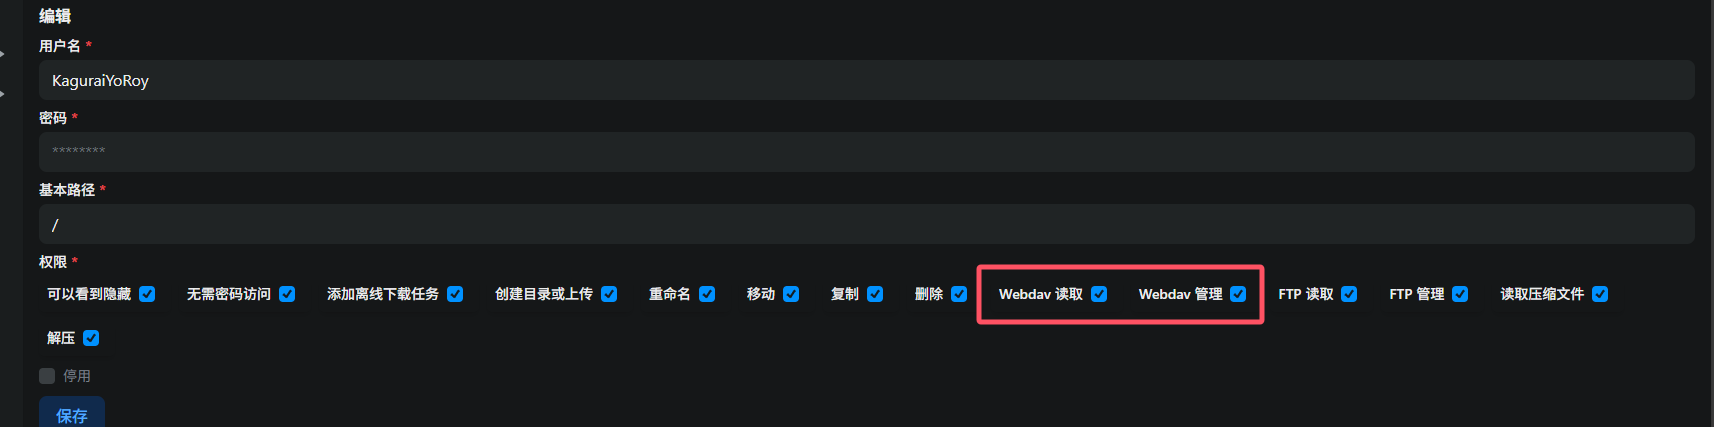
After setup, go to the Alist admin panel -> Users, edit your user or create a new user, and check the Webdav Read and Webdav Manage permissions to enable WebDAV access for this user.
Configuring TrueNAS Sync
Go to TrueNAS Admin-Credentials-Backup Credentials, and add a Cloud Credential with the following parameters:
- Provider: WebDAV
- Name: Custom
- URL: Alist address +/dav, e.g., I used
http://127.0.0.1:8088/dav - WebDAV Service: OTHER
- Username和Password: Alist account credentials
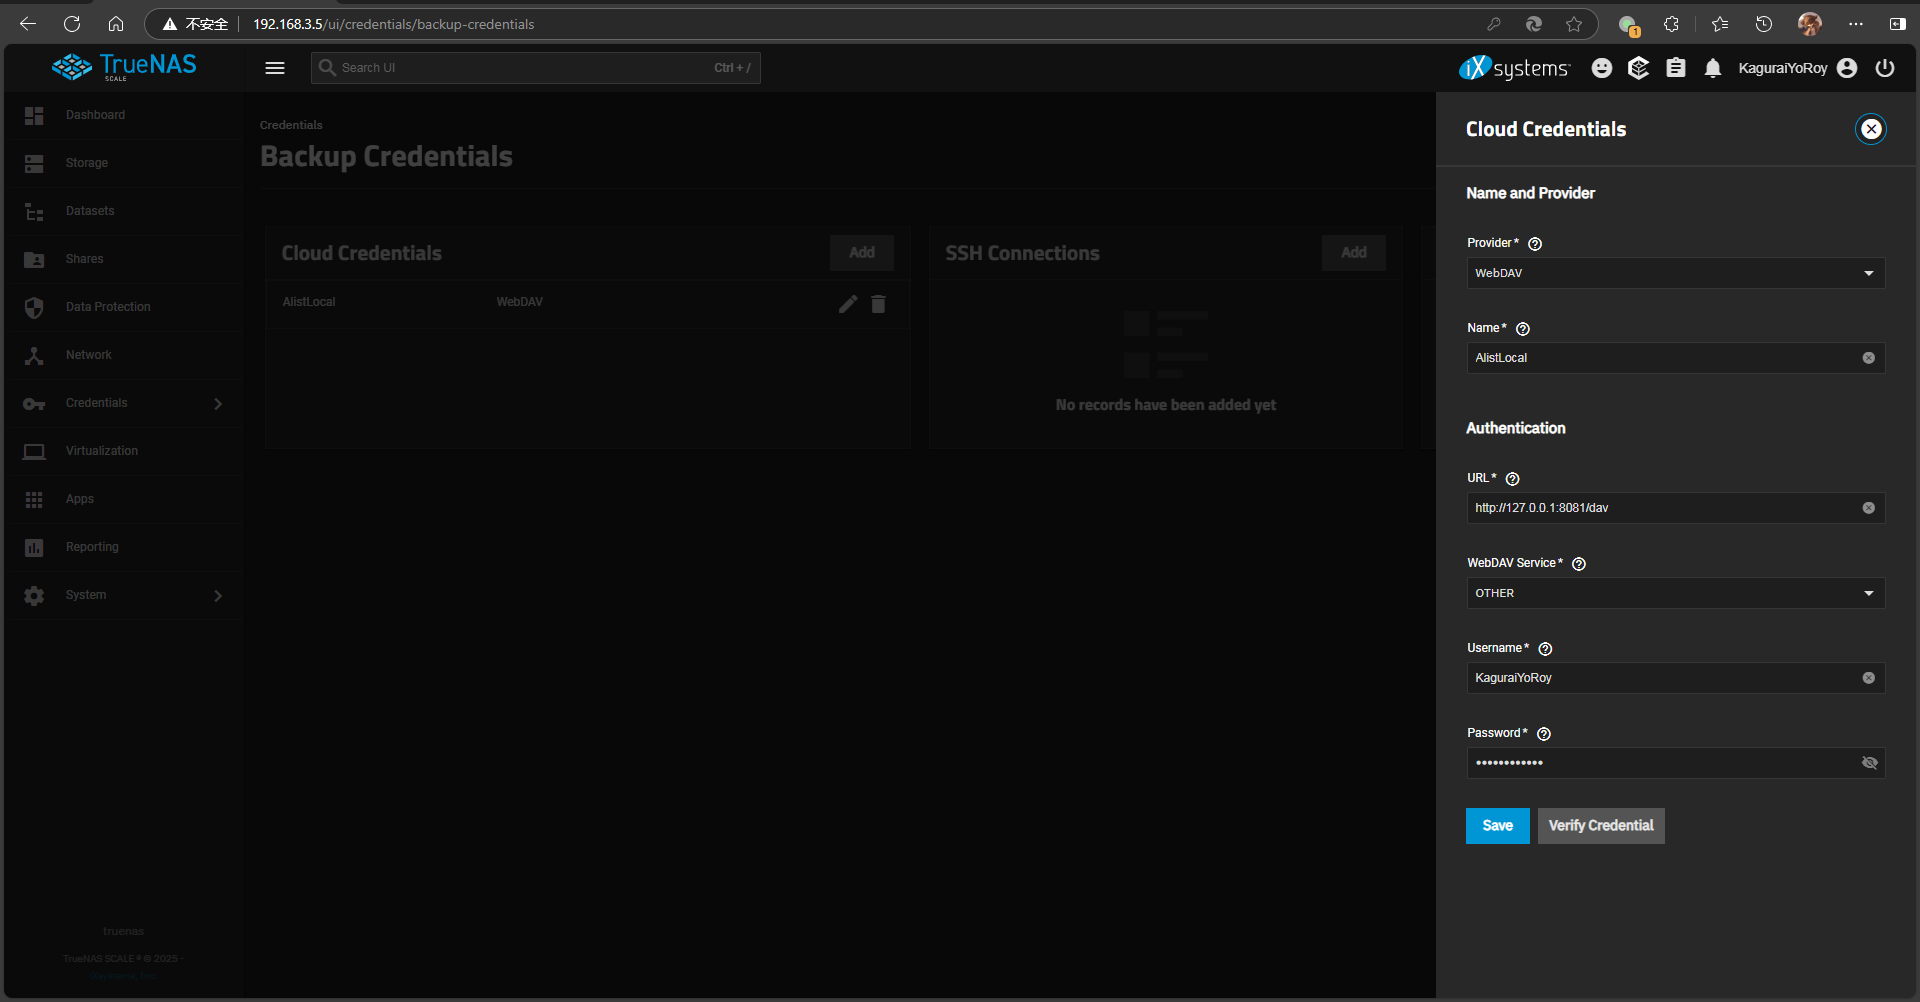
Verify the credential and save it if successful.
Next, go to TrueNAS Admin -> Data Protection, and add a Cloud Sync Task. Under Provider, select the WebDAV credential for Alist created earlier. The parameters are explained in detail below:
- Direction: Choose PULL (cloud to local) or PUSH (local to cloud)
- Transfer Mode:
- COPY: Copy files. Files deleted from the source folder later will not be deleted from the target.
- MOVE: Copy files and then delete them from the source folder after transfer.
- SYNC: Keep the source and target folders synchronized. Files deleted from the source will also be deleted from the target.
- Directory/Files: The local file or folder to sync.
- Folder: The target folder in the cloud storage.
- Description: Notes.
- Schedule: Set a schedule using Cron syntax. You can use predefined intervals or write your own.
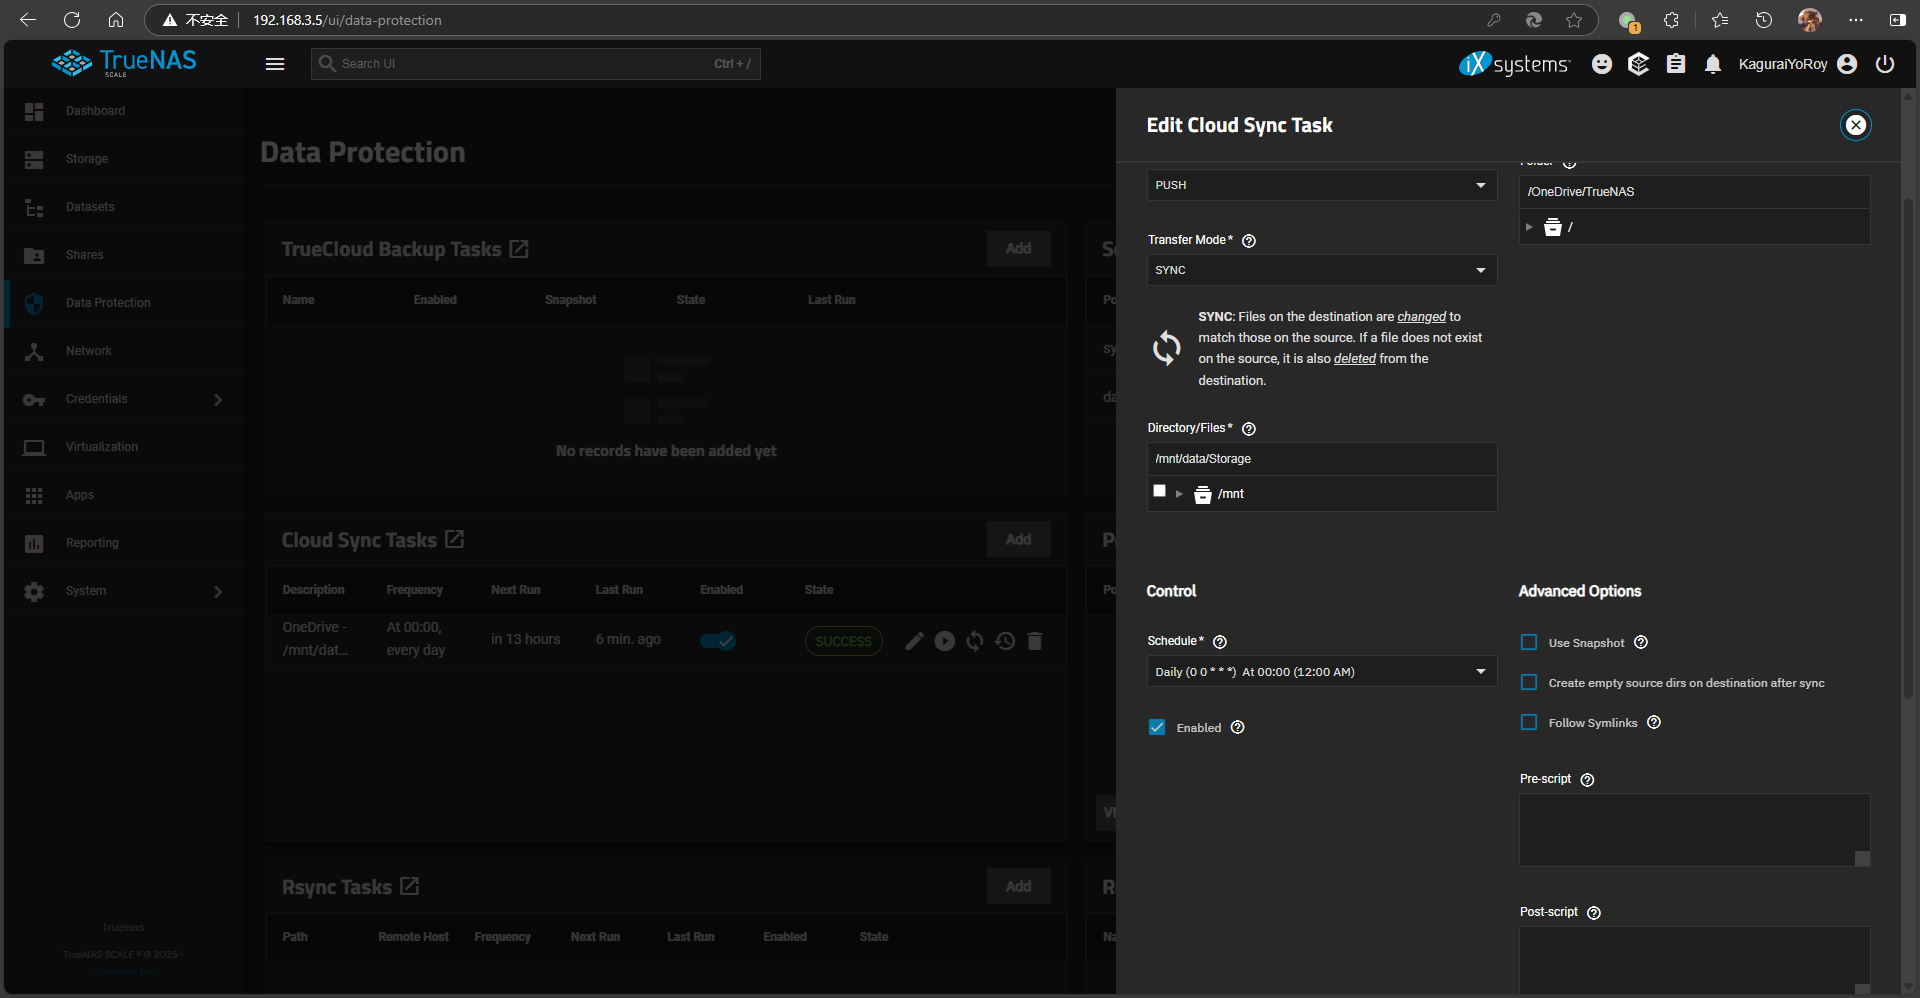
For example, I selected PUSH, SYNC, syncing from /mnt/data/Storage to /OneDrive/TrueNAS, scheduled to run daily at 00:00.
After editing, save the task. It will automatically upload local files to OneDrive at the scheduled time.
Old Solution Project Address:
Reference Articles:


Comments (0)